
How to import a GPX file into Garmin Basecamp

Estimated reading time: 9 minutes
I always bring my Garmin Foretrex 601 with me when I go out for a SOTA activation. The benefits of doing so are twofold: To begin with, for more complicated routes, I use Garmin BaseCamp in conjunction with Garmin OpenTopoMap to plan a route and download it to my Foretrex 601. Then I use this pre-planned route, along with common sense, to get to my destination. Second, tracking: My Foretrex 601 is set to save a GPS waypoint every 25 metres. When I get home, I can extract various statistics (distance, speed, height) and compare the planned route to the actual one.
The most important feature, however, is that I can export the saved waypoints into a GPX-file, which I then upload to my SOTA tour database. GPX, or GPS Exchange Format, is an open XML-style format designed as a common GPS data format for software applications. It can be used to describe waypoints, tracks, and routes. Anyone can use this searchable database to download my tried-and-true route to a summit and import it into their own GPS device. This article will walk you through the process of downloading the GPX file, importing it into Garmin BaseCamp, converting it to a route, and finally downloading it to your GPS device.
To begin, look up your summit on the SOTA tour database. Once you’ve found your mountain you can download the recorded route via a right-click on a GPX-nn (i.e. GPX-01; if multiple routes are available, they are labelled GPX-02, GPX-03, and so on) titled link and select „Save Link As“.
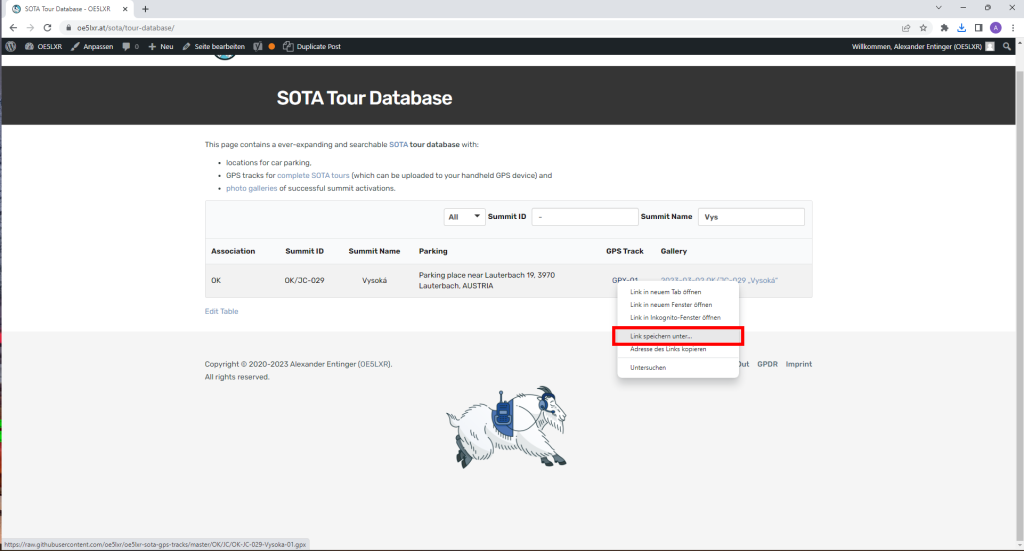
As a result, a save file dialogue appears, allowing you to specify the destination for the downloaded GPX-File. The important thing here is to make sure that the file-type is set to GPX-file (*.gpx), otherwise it will be saved as a text file (*.txt), which will prevent it from being imported into Garmin BaseCamp.

Start Garmin BaseCamp next. Select „File -> Import …“ (or Ctrl+I) to import the previously downloaded GPX-file into Garmin BaseCamp.
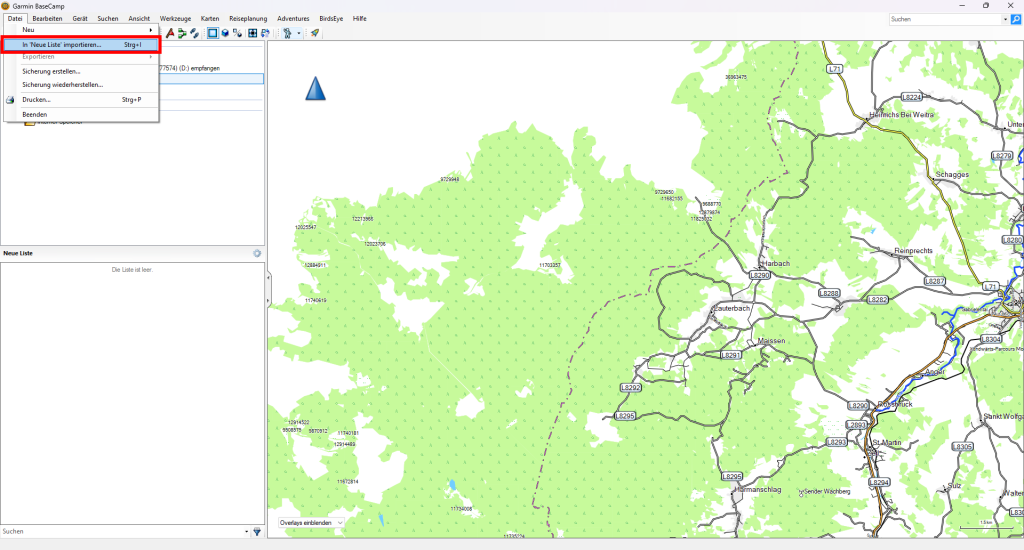
A file import dialogue appears, and you must navigate to the location where you saved the downloaded GPX-file. It’s critical that you select „all supported formats,“ or else BaseCamp may perform some pre-filtering that prevents you from seeing your GPX-file. If you can’t see your GPX-file despite selecting „all supported formats,“ it’s likely that the GPX-file was saved as a text file instead (likely as gpx-filename.gpx.txt). You can fix this by removing the .txt suffix from the file using Windows Explorer.

You should now be able to see the recorded track in Garmin BaseCamp’s map view. It should be noted that the track is not yet suitable for navigation. Right-click on the track and select „Direct Route from Selected Track“ to generate a navigation route.
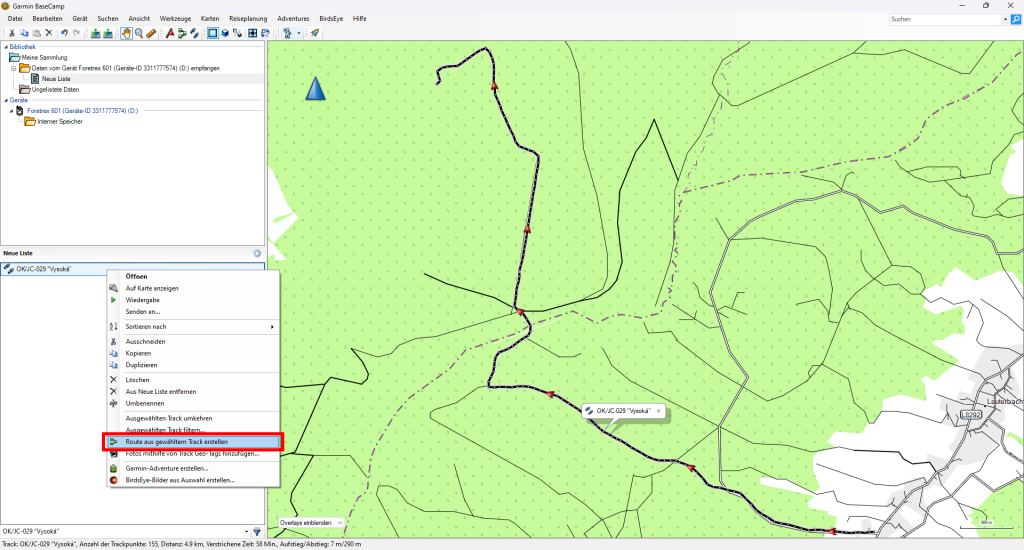
A pop-up window prompts you to either manually enter the number of desired waypoints for the route or to let Garmin BaseCamp figure it out for you. It’s usually fine to delegate this to BaseCamp.

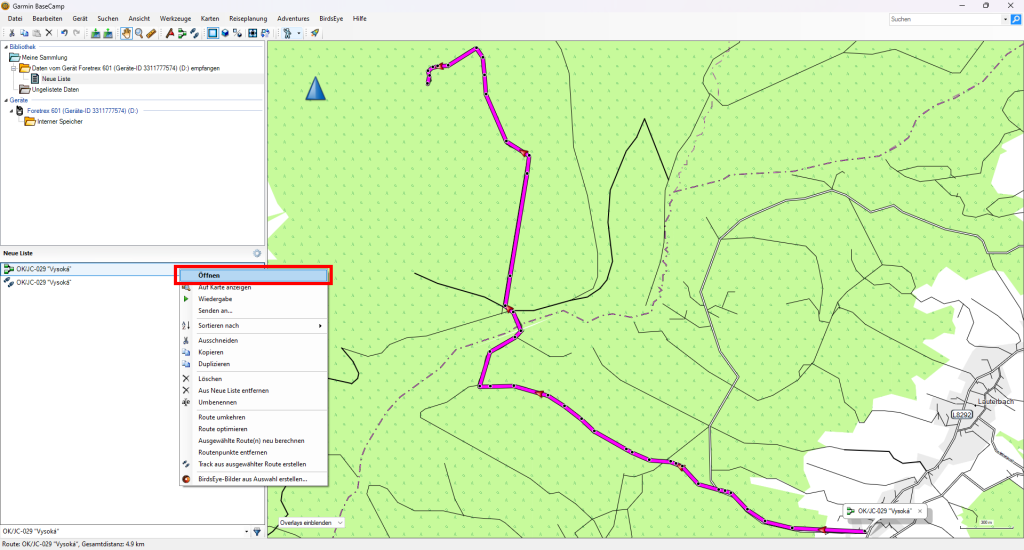
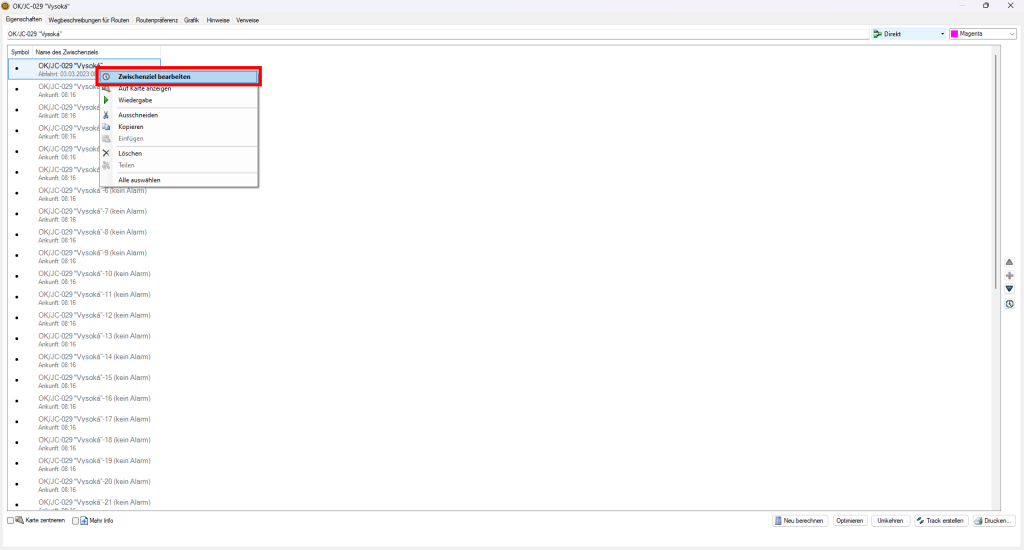
The route has now been successfully generated and is visible as a purple overlay on top of the previously imported grey-coloured track. However, some fine-tuning is necessary. By default BaseCamp generates a name for each waypoint by taking the route name and appending a number that increases with each waypoint. Unfortunately, as the amount of visible characters in the route selection menu on my Foretrex 601 is limited in most cases the incremented number is not visible, making it difficult to determine which of the presented options is the start and which is the end of the route. To avoid this, let’s give meaningful names to both the first and last waypoints on your route. First, open the route by right-click on the route and selecting „Open“.
Right-click on the first waypoint and choose „Edit target“ to change the waypoint’s name from the one assigned by BaseCamp to one of your choice. For the first waypoint, I recommend a simple name like „Start,“ „Parking,“ or something similar.
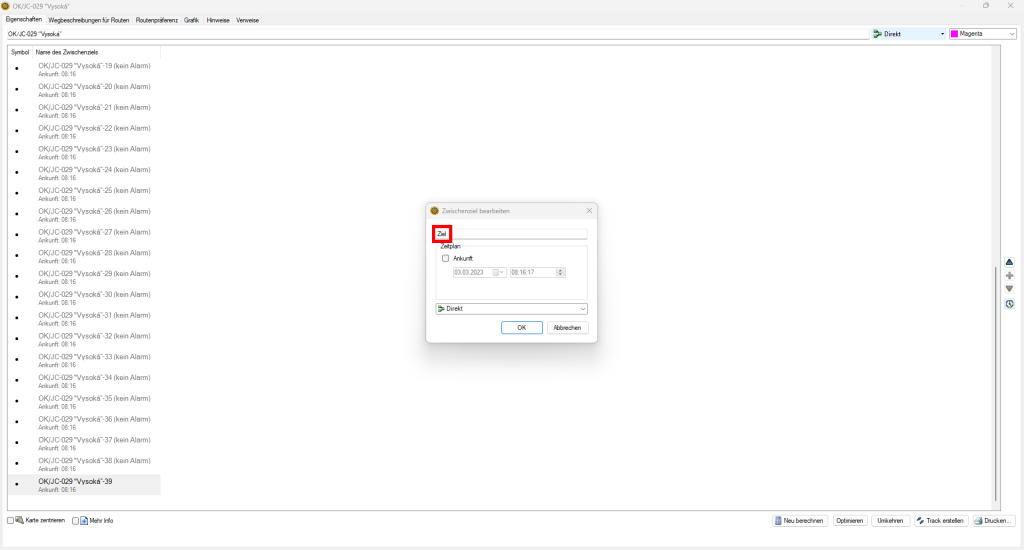
Enter the name of your custom waypoint and confirm by clicking the „OK“ button.

Choose the final waypoint and continue in a similar manner. I usually rename the final waypoint to „Ziel“ (which is German for destination), but any name that is sufficiently distinct from the ones generated by BaseCamp and easily recognisable by you, such as „summit“, „top“, „Matterhorn“, etc., will suffice.
The only thing left to do is export the route to your GPS device. You can accomplish this by right-clicking on the route and selecting „Send to Device“.
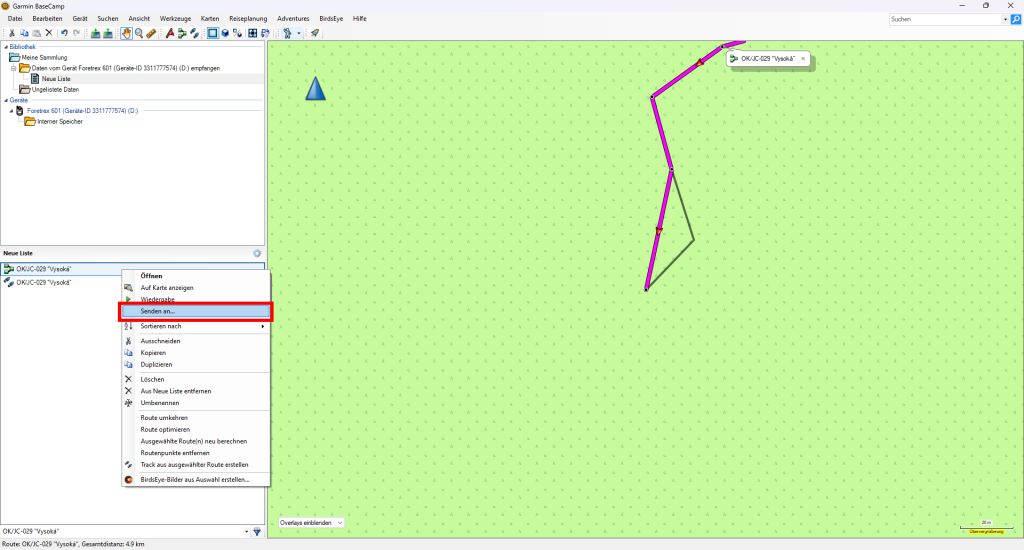
Another dialogue box appears, allowing you to select the device to which the generated route should be sent. In my case, the only GPS device available is the Fortrex 601, which I choose.

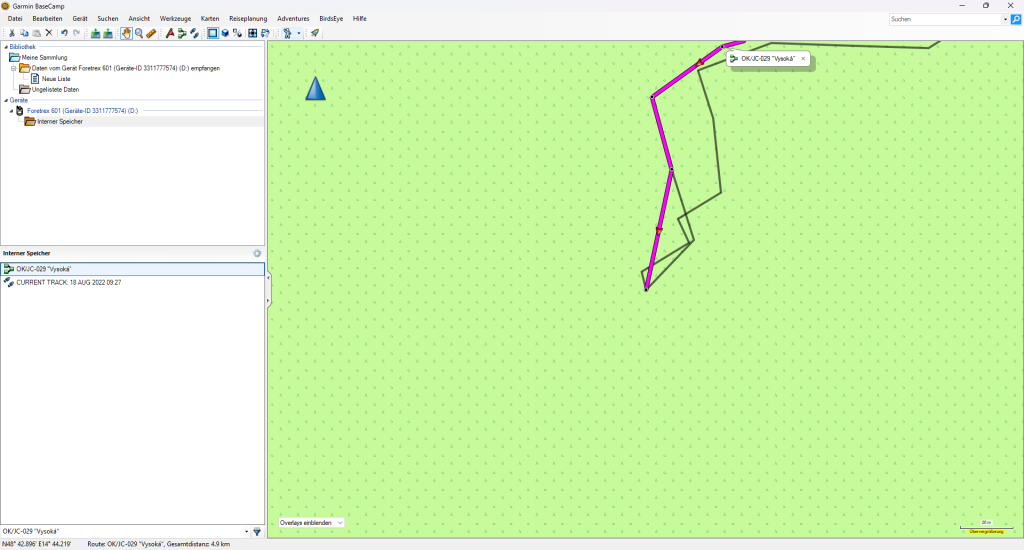
In Garmin BaseCamp, select your device and check the content of your internal memory to see if the route was successfully exported. Your newly imported route ought to be displayed.
Finally, use the available Windows tools for safely ejecting a USB device to safely disconnect your GPS device from your PC.

After safely disconnecting, and before embarking on your journey, I strongly advise you to turn on your GPS device and ensure that the route has been properly imported and can be selected. Nothing is more frustrating than arriving at the start of your hike and discovering that your painstakingly planned route did not make it into your device’s internal memory.
With this in mind, I wish you many successful SOTA activations and good DX!