How to automate your QSL card workflow
Estimated reading time: 8 minutes
Exchanging QSL cards to confirm radio contact with other ham radio operators is part of the hobby for many hams. Although it’s easy to rack up QSOs (contacts), manually filling out QSO details on the back of a QSL card is a different matter. Many hams – and I speak from personal knowledge – sit on a backlog of incomplete cards. To avoid this unnecessary suffering, I’ve applied a little automation to the matter. Want to learn more? Read on!
Table of Contents
The time-saving idea is to print the QSO data on adhesive labels, which you can then stick on the backs of the QSL cards. The first step is to gather the data.
Prepare the data
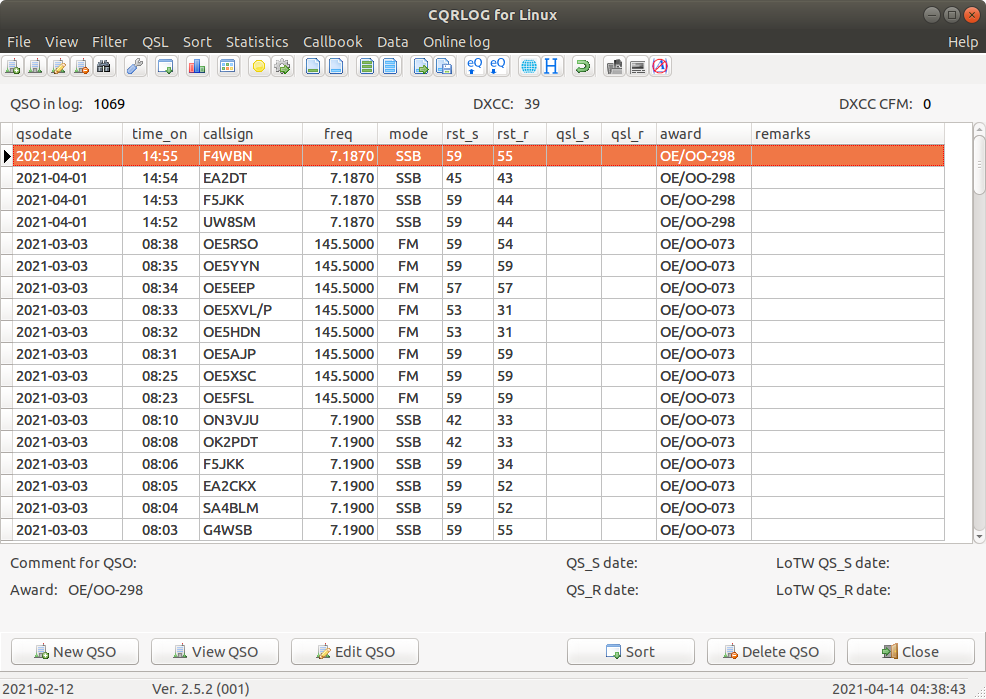
First you need to export the QSOs you want from your logging software into a format suitable for processing, such as CSV. I use CQRLOG, but you can use any logging software for this step. When I open CQRLOG, it shows me the input fields for a new QSO. Open the view showing your past QSOs. In CQRLOG, you can display the QSOs via File -> Show QSO List.
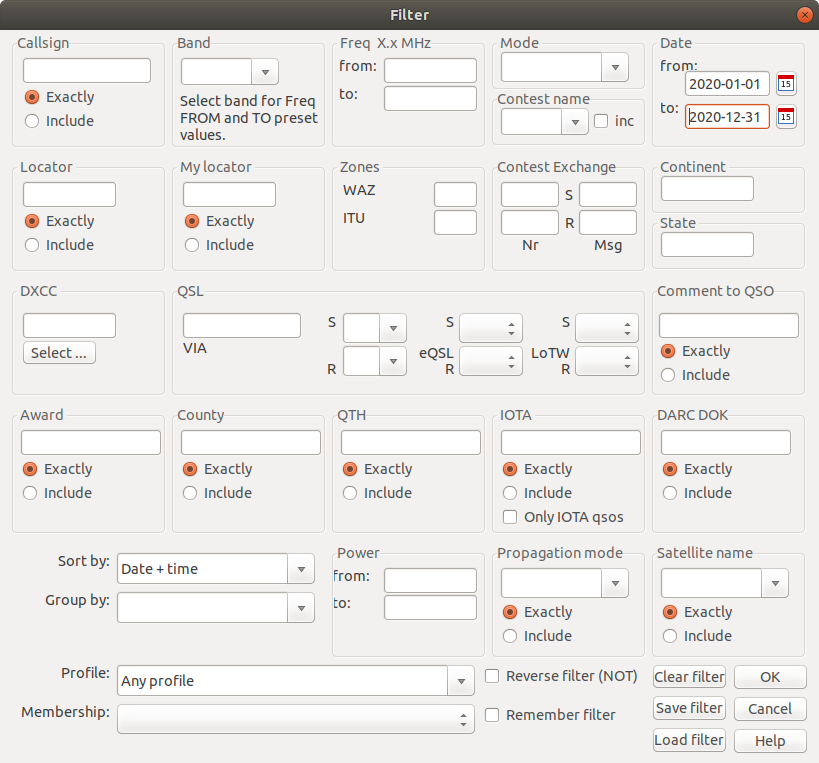
You probably don’t want to print labels for all of your QSOs. For instance, you might have already sent the QSL cards for some of them, perhaps at intervals (e.g., yearly, as I do). Applying a filter will allow you to select your desired range. You can filter your QSOs in CQRLOG via Filter -> Create.
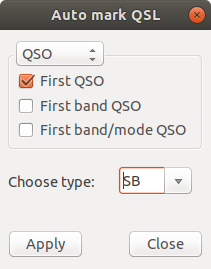
To set your desired method for sending the QSO card after logging the contact, use the Auto Mark feature. In the image below, SB means Send via Bureau, the volunteer-based QSL card distribution service associated with your local ham radio club. The other options are SM, which is sending via the QSL manager, or SD, which is sending your QSL card to the other ham via the postal service. You can select your method via QSL -> Auto mark QSL in CQRLOG.
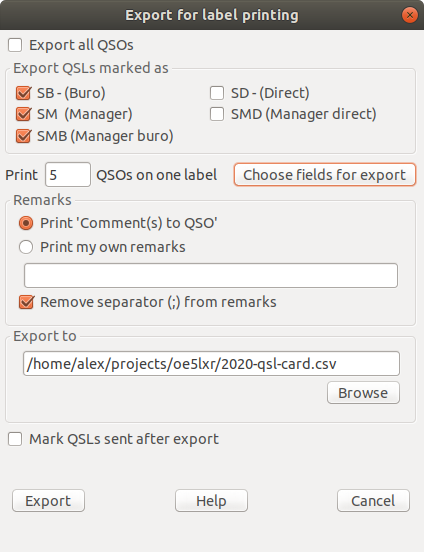
It’s now time to export the QSO data. In CQRLOG, you can export the QSO data via QSL -> Export. The “Export for label printing” popup window allows you to specify the QSO type (e.g., SB, SM, …) and the destination of the exported CSV file. When you’re all set, click the “Export” button.
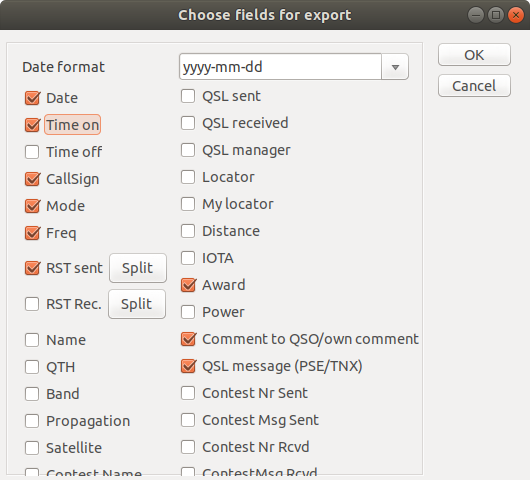
Before exporting, you can choose specific data fields for export. In CRQLOG, click the “Choose fields for export” button. In the following image, I’ve chosen the “Award” field addition to the usual fields because I’m logging the SOTA summit ID there.
In the next image, you can see the CSV file displaying all of my QSOs from 2020. Column A contains data, Column B has the contact time in UTC, and Column C shows the worked call sign, etc.
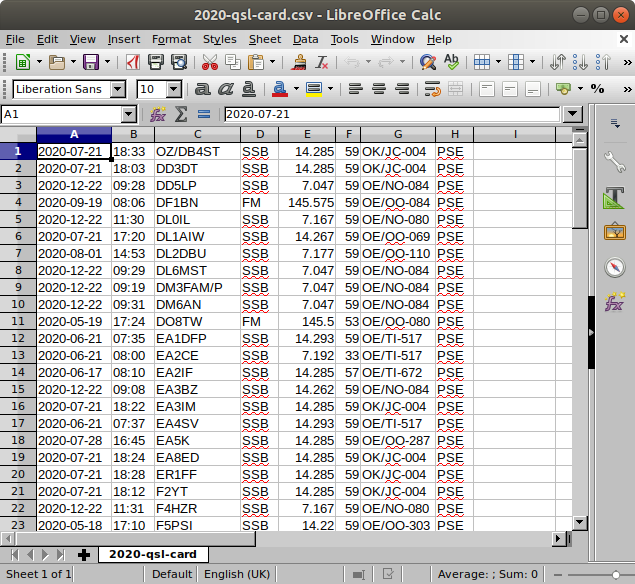
Now that the QSO data has been successfully exported its time to design and print it to a label.
Design and generate the labels
I use gLabels to design the labels I stick to the back of my QSL cards. You can either compile it from source or use a packet manager to install it
sudo apt-get install glabels-3After starting the gLabels application, you can choose to design your own label or use a template. To open a template, go to File -> Open. Several QSL card templates are available here (Download). In the image below, ${1} refers to data in the first column in the CSV file, ${2} to the data in the second column of the CSV file, and so on.
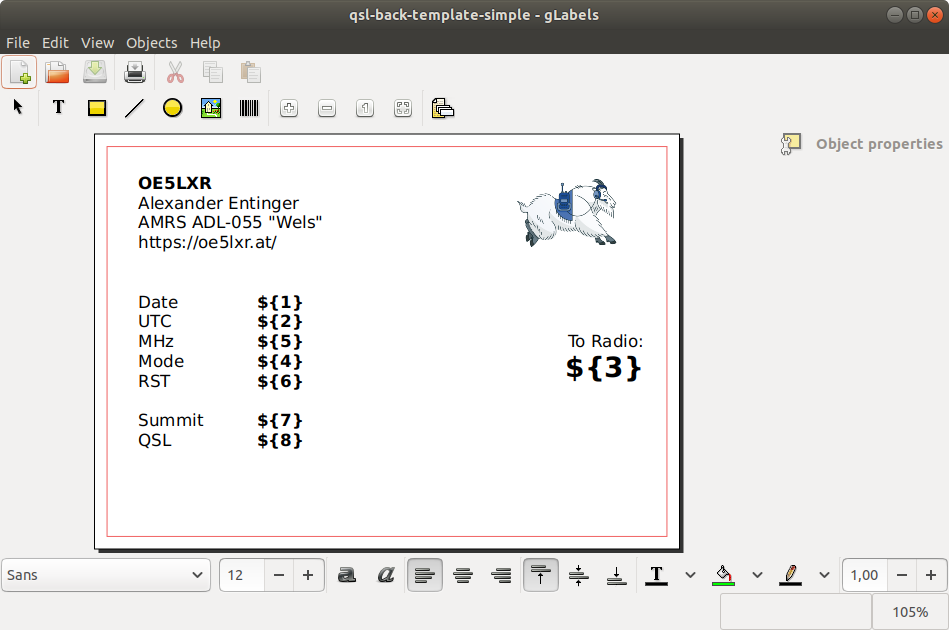
In Europe, DIN A6 adhesive stickers are the closest in size to the standard QSL card format. Be aware, though, that DIN A6 labels (148 x 105 mm) are slightly larger than the standard QSL card format (140 x 90 mm). When using DIN A6 labels you must, therefore, leave sufficient margins around your label design to allow for trimming your label to size. This may also be the case with standard label sizes in other locations.
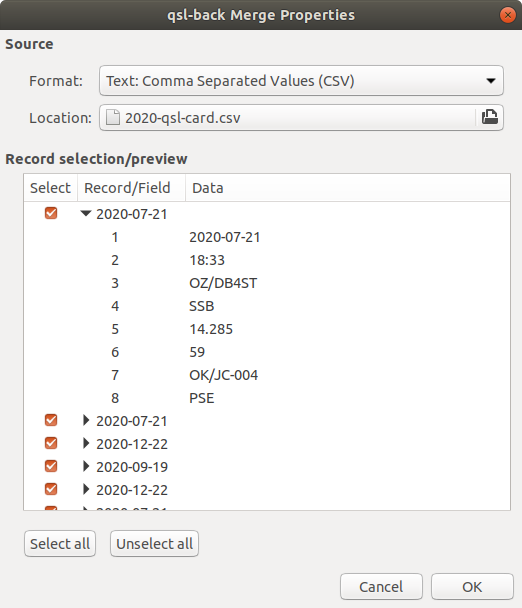
When you’ve finished designing the label template, it’s time to create the output file. You’ll create the set of labels by merging the template with the exported QSO data stored in the CSV format, in gLabels via Objects -> Merge properties. Under Format, select the “Text: Comma Separated Values (CSV)” option, and under Location, select the name of your exported CSV file.
Print the labels
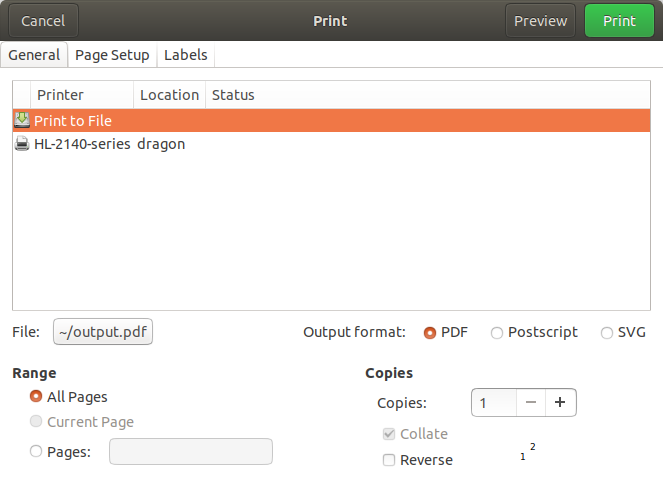
You can now print your labels directly or export them to PDF via File -> Print in gLabels. I prefer to export to PDF, but this is mainly because I don’t have printer drivers on Linux and need to print from Windows.
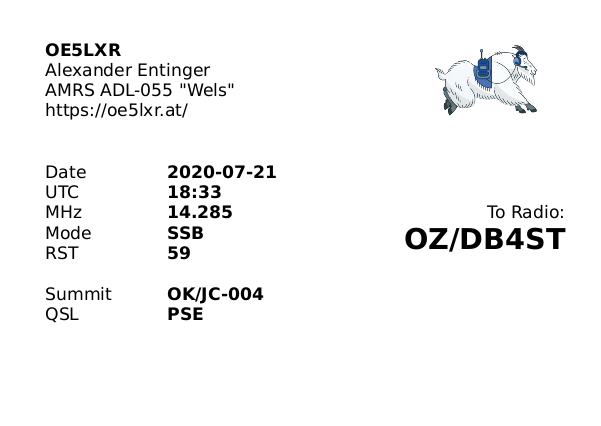
The image below was taken from my exported PDF. You can also generate a PDF to check the appearance of your QSL card labels before printing.
To print, load the labels into the printer. It can take a bit of fiddling to get them positioned correctly in the printer tray, but once that’s done, it’s easy. The last step is to open the PDF file and select DIN A6 (or your label size) and then the Print option.
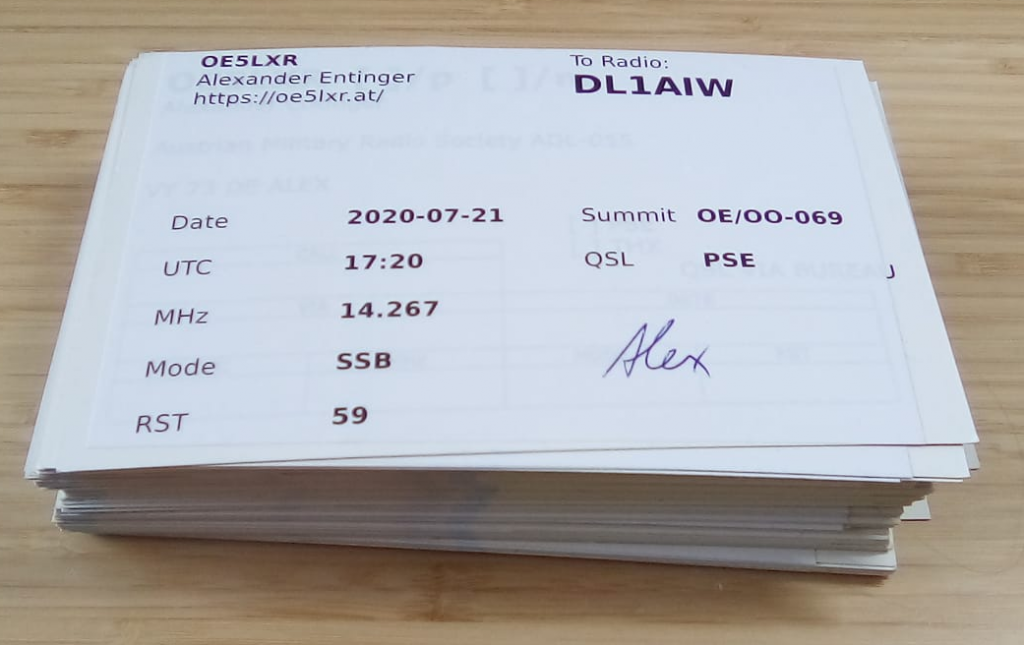
Using automation allowed me to print the whole QSL stack for 2020 in just a couple of hours. I’m so glad that chore is done! 😉

2 comments
Yvan (ON4YVM) 18/02/2022
Dear Alexander, As I am new to the HAM-hobby (license june, 2021) and QSL-cards (looking to develop a good design), and already got a pile of QSO's that I want to confirm with a decent paper QSL-card. Some of my QSO's are logged from within WSJT-X, others are manually entered in CQRLog or a plain text document. Your idea of combining a .CSV log-extracts with Glabels is fantastic! In the past (about 15 years ago), I used glabels under Linux for bulk mailings at work. Many thanks for this clever solution to my problem! It is simple but brilliant!!!
Alexander Entinger (OE5LXR) 19/02/2022
Dear Yvan, Heartfelt congratulations on obtaining your license and thank you very much for your kind comment. I'm glad to hear me writing down my workflow has been of help to you =) All the best on your ham radio journey and looking forward to hear you on the bands (possibly SOTA? ;) ). vy 73 de Alex, OE5LXR